Sally Lunn Bread
Is Sally Lunn Bread even bread? Or is it a cake? Or is it something else? No matter what you call it or what form you’ve had it in before there’s no doubting its subtly sweet flavor and light texture make it a great base for lots of different flavors and it’s easy to make, too! Get all the steps here.

History of Sally Lunn Bread
Sally Lunn bread has a rich history rooted in England, with its origins traced back to the 18th century. The evolution of its recipe reflects changes in baking techniques and ingredient availability, while its popularity has spread beyond its homeland to various parts of the world.
Sally started in England
Sally Lunn bread originated in Bath, England, during the 18th century. It is named after a Huguenot baker, Sally Lunn, who is believed to have introduced the recipe to the area.
The recipe originally included simple ingredients such as flour, water, yeast, sugar, and butter. This original combination was baked in a circular cake tin like a bundt pan, resulting in a distinctive, soft loaf. Sally Lunn bread quickly became popular with locals and travelers alike, often served warm with butter.
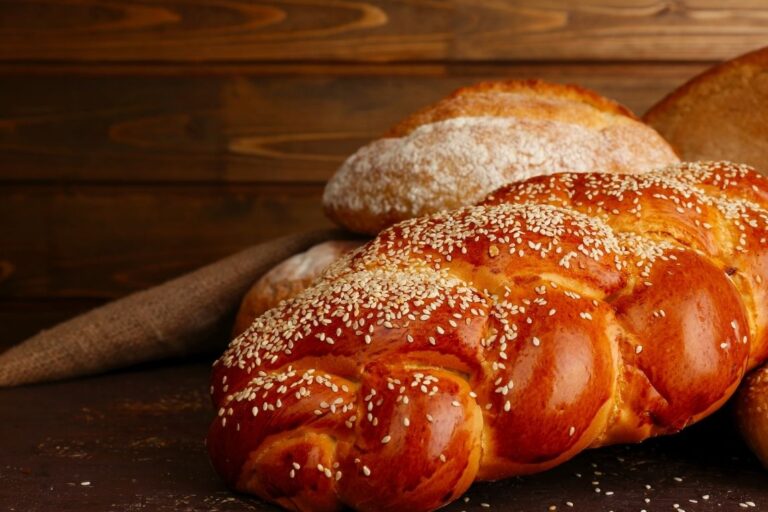
My version is a quick bread style, but this Sally Lunn looks more like an actual loaf of bread.
Evolution of the Recipe
As the years passed, the recipe for Sally Lunn bread underwent several adaptations. In the 19th century, bakers began experimenting with additional ingredients like eggs and milk, enhancing the bread’s richness. Variations appeared, incorporating spices and dried fruit to cater to evolving tastes.
Industrialization also played a role in the evolution of this bread. With advancements in baking technology, commercial bakers produced Sally Lunn bread on a larger scale, making it more accessible to the public. This shift allowed the bread to maintain its popularity in various settings, from tea rooms to bakeries.
Ingredients
The quality of ingredients used in Sally Lunn bread is crucial to achieving its unique flavor and texture. This bread features a combination of simple components that contribute to its lightness and richness.
Flour Types and Selection
Sally Lunn bread typically uses all-purpose flour, which provides the right protein content for good structure. For a lighter texture, some bakers opt for bread flour, known for its higher protein levels.
Key flour choices:
- All-Purpose Flour: Versatile and readily available.
- Bread Flour: Higher protein for more structure.
Whole wheat or spelt flour can be used for a nuttier flavor, but adjustments in hydration will be necessary and we haven’t tested it.
Yeast and Leavening Agents
Yeast serves as the primary leavening agent in Sally Lunn bread, contributing to its airy texture. Instant yeast is commonly recommended for its convenience and reliability, as it doesn’t require proofing like active dry yeast.
Common yeast options:
- Instant Yeast: Quickly activated, no proofing needed in most cases but if you are a new baker, activate yours in water, milk or whatever liquid is in your recipe.
- Active Dry Yeast: Requires activation before use.
In some recipes, a small amount of baking powder is added for extra lift, particularly in variations that include rich add-ins. A high-quality yeast should be used to ensure consistent results.
Add-ins and Flavor Variations
Sally Lunn bread can be customized with various add-ins to enhance flavor. Common additions include eggs, milk, and butter, which contribute to a richer taste and tender crumb.
Popular add-ins:
- Eggs: Improve structure and color.
- Milk: Adds moisture and richness.
- Butter: Enhances flavor and tenderness.
Additionally, spices such as nutmeg or cinnamon can impart warmth, while dried fruits or herbs provide unique flavor profiles. Experimenting with different combinations can yield delightful variations.
Mixing and Kneading
To start, the ingredients for Sally Lunn bread typically include flour, yeast, milk, sugar, eggs, and butter. Our version is more like a cake so there’s some baking powder and salt, too. Mix the flour, baking powder and salt together and set aside.
Activate the yeast in the warm milk and set it aside for 5 or so minutes to activate and start getting foamy.
In a stand mixer or with a hand mixer beat together the sugar and butter.


Beat in the eggs and flour
Beat in the eggs one at a time followed by the flour in three additions alternating with the milk in two. So that’s 1/3 flour-1/2 of the milk-1/3 flour-1/2 of the milk-1/3 flour.
Mix gently and only until combined and then stop so you don’t make the batter tough.
Transfer to a prepared loaf pan and cover with plastic wrap. Let the batter rise 45 minutes to an hour until slightly puffed. It won’t rise a lot though.


Baking
Preheat the oven to around 350°F (175°C) before placing the dough inside. Bake the bread for 25-35 minutes. The timing can vary based on the size of the loaf.

Traditional Uses
Historically, Sally Lunn bread has often been served with butter and jam, complementing its rich, sweet flavor. It is also frequently featured in afternoon teas, alongside sandwiches and pastries. In addition, the bread can be used to create bread puddings or as a base for sweet and savory toppings, making it popular during festive gatherings and celebrations.
This loaf is a blend between sweet and savory. At first it hits like a pound cake then the more you chew you’ll wonder if it’s cornbread (or at least my husband did). It’s very basic and can hold up to a variety of flavors but if you want to use it with something savory just remember it is on the sweeter side.
Adaptations and Innovations
Innovations have emerged around Sally Lunn bread, with various adaptations catering to health-conscious consumers. Gluten-free and whole grain versions are gaining popularity, enabling more people to enjoy this classic. Additionally, chefs are experimenting with flavor infusions, such as adding herbs, spices, or dried fruits, creating unique twists that enhance the traditional recipe. Creative uses like sliders or canapés further demonstrate its versatility in modern dining experiences.

How to store Sally Lunn bread
Room Temperature Storage
- Wrap the bread in plastic wrap or place it in an airtight container.
- Keep it in a cool, dry place away from direct sunlight.
- Consume within 2 to 3 days for the best taste and texture.
Refrigeration
- Refrigerating Sally Lunn bread is not recommended as it can dry out the loaf.
- If necessary, store it in an airtight container for up to a week.
Freezing
- For longer storage, freezing is an ideal option.
- Wrap the bread tightly in plastic wrap and then in aluminum foil to prevent freezer burn.
- It can be frozen for up to 3 months.
Thawing
- To thaw, remove the bread from the freezer and leave it at room temperature.
- Optionally, it can be warmed in the oven for a few minutes to restore its softness.

Serving Suggestions
Sweet Toppings for Sally Lunn
- Butter and Jam: Spread a thick layer of butter and top with fruit preserves.
- Honey: Drizzle honey for a simple yet delightful taste.
- Cream Cheese: Pair with fruit slices for a refreshing treat.
Savory Options
- Cheese: Serve with a selection of cheese for a delightful snack.
- Pâté: Enjoy with pâté or spreads for a more sophisticated appetizer.
- Soups: Use slices for dipping in hearty soups or stews.
Other bread recipes to try
- Quick buttermilk scones are an easy savory side.
- Classic Southern Spoon Bread is a mix and bake dream.
- Gluten Free Buttermilk Cornbread brings variety for special diets.

Ingredients
- 2 cups all purpose flour 250 grams
- 2 teaspoons baking powder
- 1 teaspoon salt
- 3/4 cup milk lukewarm
- 1 teaspoon active dry yeast
- 1 stick unsalted butter softened
- 1/2 cup sugar
- 2 large eggs room temperature
Instructions
- In a bowl whisk together the flour, baking powder and salt. Set aside.
- In a small bowl or measuring cup mix the milk and yeast and set aside until the yeast begins to foam; about 5 minutes.
- In a third and largest bowl beat the sugar and butter until light and fluffy; about five minutes. Add the eggs one at a time.
- On low speed add the flour mixture to the batter in 3 additions, alternating with the milk in 2 parts. Beat the batter until smooth then pour into a lightly greased 9x5x3 inch loaf pan.
- Cover with greased plastic wrap and let rise 45 minutes. It won’t rise much.While the batter rises, preheat the oven to 375. Bake on the center rack until a toothpick inserted comes out clean or it begins to pull away from the sides of the pan–about 30 minutes.